Monday, June 30, 2014

Baby Card for CAS(E) this sketch


I love this week's CAS(E) this sketch so much I may play again! This is what I came up with...A bunch of friend's are expecting, and I want to be ready with cards....


I think I went a bit overboard with the pearls on the banners...I struggle with embellishments!! I may remove them tomorrow...What do you think? keep the pearls? Or ditch them?

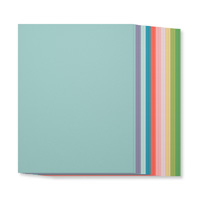
I stamped the carriage in Pool Party ink, cut it with the framelits, then stamped it again in Pistachio Pudding, fussy cut it, and pasted it  on. The Sweet Sorbet DSP was from Sale-A-Bration. I cannot get enough of that dsp. I love soft, subtle colors, especially for baby cards! The stitched rectangle die is from Lil Inkers.

As always, a coordinating envelope is a must with my handy envelope punch board.

Please support my cardmaking hobby by clicking here to order your own Stampin' Up! supplies. 


Stampin' Up! Products Used on this card. (Click on the images below for more product details and to shop online.)

Thursday, June 26, 2014

Embossed Vellum


Halloween in June! Someone asked me to help her with some Halloween inspiration. I really don't have much Halloween stamping stuff, so this is what I came with my limited supply. 

I embossed vellum using the retired spider web embossing folder (it cracked a bit, and I was going to redo, but figured it's part of the look!), cut some letters with my new little letters framelits, and grabbed a spider from my kids collection, to complete this little treat box!


Please support my cardmaking hobby by clicking here to order your own Stampin' Up! supplies. 


Stampin' Up! Products Used on this card. (Click on the images below for more product details and to shop online.)


Friday, June 20, 2014

Hello Love Catalog CASE


I love creating my own original cards, or working from a sketch. But I also LOVE to CASE (Copy and Share Everything) cards. There is something so satisfying in making a card I know I'm going to love! I saw this card in the catalog, and I had to get this hostess set so that I can make the card myself. 


I changed a few things - like the colors, all my colors are from the subtles collection (I finally got myself a set of complete set of subltes ink pad - and I love having every color!), except for the word bubble and sentiment (crumb cake). I also made my own banner using a stamp from Perfect Pennants (they used designer paper in the catalog). 


A few tips when making this card: 

  1.  My cardstock kept tearing when I attempt to run the woodgrain embossing folder...I looked up some tips online, and ended up cutting a piece 4 1/2 by 6 1/4 piece of vellum and adhering it to the inside of my embossing folder, while running a single sheet of white cardstock through on Tab 2. I then adhered this piece of cardstock to my card front.
  2. To make the bird, I stamped it twice with crumb cake ink, once on blue cardstock, and once on so saffron. I carefully snipped both out, cutting off the legs and beak on the blue. I then adhered the blue bird to the yellow bird. 
I love how the card came out! And this stamp set is such fun :-). Live int Los Angeles area and want to earn it free? Contact me to set up a workshop. 

Please support my cardmaking hobby by clicking here to order your own Stampin' Up! supplies. 


Stampin' Up! Products Used on this card. (Click on the images below for more product details and to shop online.)


Sunday, June 15, 2014

Happy Father's Day! With Little Letters Thinlits Dies


I am honored to be a guest stamper on Mary's Stampin' Pretty Blog today. If you came from there, thanks for stopping by my blog for all the details!

To make this card, I first stamped all my images onto on 4 1/2" by 6" piece of whisper white cardstock. The sun is from the hostess set, Hello Love, the little star in "father's" is from Celebrate Baby, the other images are from some of my favorite retired Stampin' Up sets (Good Neighbors, and Moving Forward). 


Next, I used a scrap piece of engineering paper (I worked as an engineer before my children were born, so I still had some leftover) to help me line up my letters perfectly. It's easy to line up the letters with the nice grid, and it's easy to center the words by counting. I added some removable post it tape to keep the letters from shifting..


I started with the word "fathers," ran that through the big shot, then moved onto "happy." Because there is only one of each letter, I used an "R" as a place holder for the 2nd "P." Don't forget to remove it before running it through your big shot!


Once I had all my words die cut, I cut a set of letter to inlay in the die cut space from assorted colors from the subtles family of colors, and carefully laid them in the spaces.  

 For the inside of the card, I stamped a little bird fromHello Love, and a sentiment from Perfect Pennants


And finally, a coordinating envelope liner using retired dsp and my envelope punch board.


Thanks for visiting!

 
Please support my cardmaking hobby by clicking here to order your own Stampin' Up! supplies. 


Stampin' Up! Products Used on this card. (Click on the images below for more product details and to shop online.)